|
|
Using the batch mode |
|
|
|
Using the batch mode |
|
The batch mode of HTML ImageMapper 13.3.2 enables you to process several projects combined as well as to effect an automatic, time-controlled processing of your projects.
To this purpose, HTML ImageMapper 13.3.2 is started as a planned task in batch mode at a time you choose.
Unlike the actual HTML ImageMapper 13.3.2, the configuration of the batch mode is not started in ArcGIS, but is in fact an independent program which is accessed via the Windows start menu. The start menu entry is:
“Programs”>”alta4 Geoinformatik AG”>“HTML ImageMapper 13.3.2”>”HTML ImageMapper 13.3.2 – Batch Mode”.
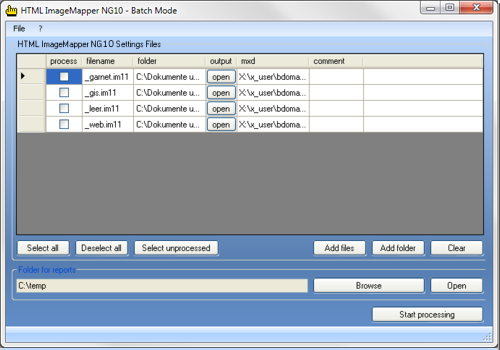
Here you can select which projects should be processed.
Please note that the current settings are saved automatically when ending the program, so they are available for the automatic, time-controlled processing without any further action.
Click on “Add files” to add a project to the list of automatically processed projects. Please notice that you cannot select a .mxd file directly, but only previously saved settings of HTML ImageMapper 13.3.2 with a ".im13" ending.
Hint: In order to select several files, keep the “CTRL” button pushed and click on the desired projects.
Alternatively, the “Add folder” button can be used to paste all projects into one directory. After selecting the directory you can determine whether or not the subdirectories are to be included in the search for projects.
After adding projects, these projects are marked as “to be processed" by default. If you do not want all projects to be processed every time the batch mode is started, you can determine which projects are to be processed.
First of all, there is the possibility to set - or to unset - a checkmark in the “Process” column of the table for individual project.
For many projects, it might be more comfortable to use the buttons “Select all” or “Deselect all” in order to select or deselect all entries.
Besides, the “Select unprocessed” button offers the possibility to select those projects which have not been processed yet.
In order to delete all entries press the “Clear” button. Alternatively, you can remove individual projects by selecting the corresponding line from the table. To this purpose, click on the small area on the left of the desired line and then press the “DEL” button on the keyboard.
When the processing is started, a report is generated automatically in form of a .xml file listing the duration of the process and the numbers of the configured and the successfully completed projects.
In addition, further information for every processed project is available.
The directory into which the files are written can be selected with “Browse” in the box “Folder for reports”.
The file names stick to the following scheme: “Batch_Log_ImageMapper_<date>_<time>.xml”.
With the “Open” button you can access the selected directory in the Explorer in order to access the files.
From the table, you can open the output directory with the “Open” button in the “output” column. Of course, this will only work if the project has already been processed, so the directory exists.
Besides, any commentary can be entered in the corresponding column for any project.
Finally, the processing of the selected projects can be started with “Start processing”.
In order to start the time-controlled processing, please read the following chapter.
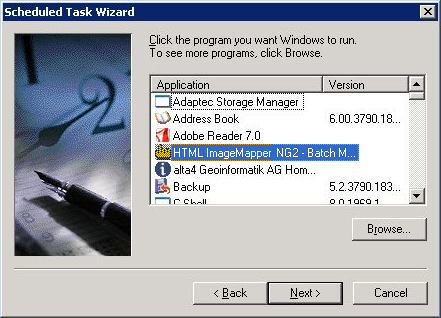
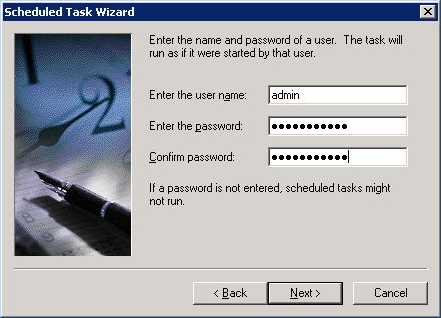
To schedule the projects configured by the Batch Mode for processing a Windows task is used.
The configuration of the Windows task is described below:
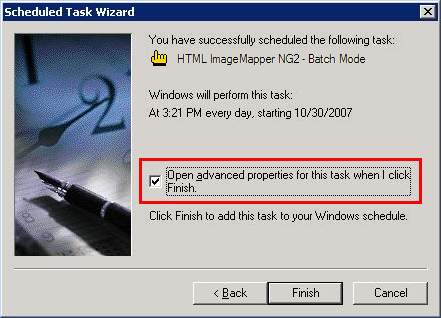
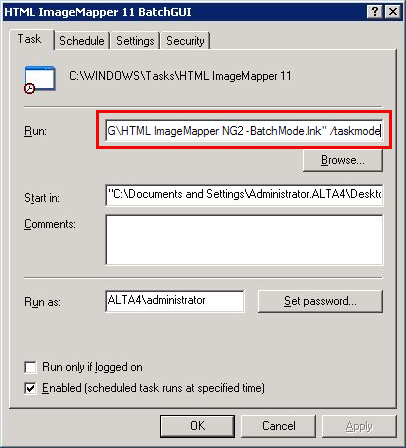
Now you can test the batch function. In order to do this, right-click in the window "Planned tasks" on the task you created and select "Run".
This starts the HTML ImageMapper 13.3.2 Batch Mode which executes your projects.