Loading the digital pictures in ArcMap
Start ArcMap. For a better visualization we recommend opening a background map containing the location where your pictures were taken. For this purpose, open for instance “Search for maps” in the start window and open a map from your hard disk. If the PhotoMapper Desktop 10.5 tool bar or the PhotoMapper Desktop 10.5 window is not displayed, load them as described in paragraph ”Loading in ArcMap”.
Select the feature class of a geodatabase or a Shapefile with the selection menu in the menu bar. You must have created or loaded these feature classes before, as described in paragraph “Geodatabases”.
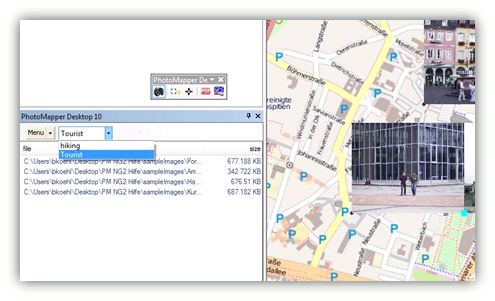
Loading individual Pictures
In order to load your pictures in ArcMap, click on “File” > “Add photos” in the menu of your
PhotoMapper Desktop 10.5 window. Now select the directory where your pictures were saved. Now you can open an individual picture – or several, if you have selected more than one with the “Ctrl” button pressed.
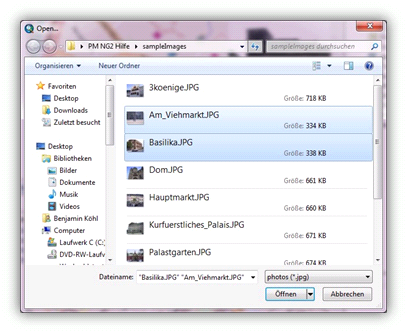
The photos are added to the selected feature class. A loading bar represents the current progress.
Loading entire folders
In the PhotoMapper Desktop 10.5 window, in the menu under “File” > “Add photos from folder” you can open all pictures from one folder. If you would like to open the photos in the subdirectories as well, confirm the query “Include subdirectories?” with “Yes”.

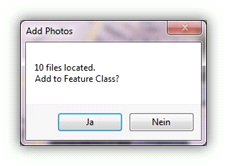
PhotoMapper Desktop 10.5 searches the selected folders for photos in the .jpg format. In the query that opens now you can decide whether you want to add the photos which were found to the Shapefile or discard the search.
Add with Drag&Drop
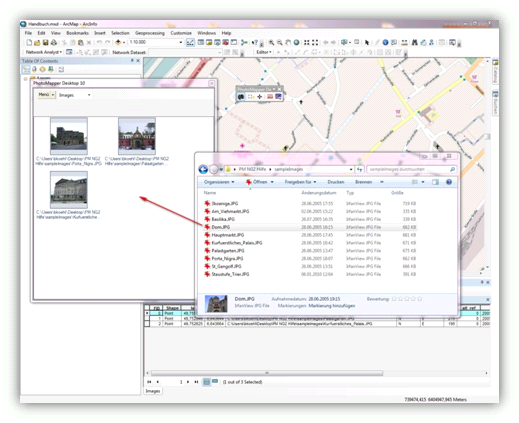
In PhotoMapper Desktop 10.5 it is possible to add photos from any file explorer window with drag & drop.
In order to do this, mark one or several photos in a file explorer and drag them into the PhotoMapper Desktop 10.5 window with the mouse button pressed.
Adding unreferenced pictures
Photos without any GPS information can be referenced retroactively using PhotoMapper Desktop 10.5.
Directory selection
In order to do this, click on "Add unreferenced photos" in the "File" menu. In the PhotoMapper Desktop 10.5 window, the display changes to a file selection with photo preview.
Select the folder. On the bottom left, the photos in the selected directory are displayed.
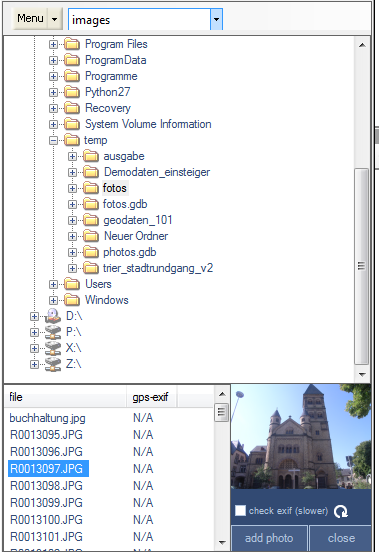
If you want to display whether or not the photos listed in the overview are georeferenced, click on the "Evaluate EXIF" selection box (for directories which have already been loaded, click on the “Refresh” button. Now, when accessing a directory, the EXIF headers of the photos will be searched for GPS coordinates and the result is displayed in the "GPS-EXIF" column of the picture list.
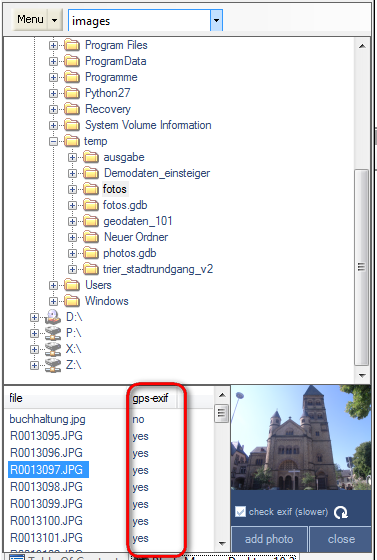
In order to refresh the photo overview of a directory, click on the "Update" symbol.
Determine location of taking
-
Mark the photo to be referenced.
-
Click on the “Add” button.
-
Now click on the location in the map where on photo was taken. PhotoMapper Desktop 10.5 saves the position data in the geodatabase. From now on, the picture is linked with this location of taking and is listed in the Thumbnail view as a georeferenced picture.
Pictures with faulty position data can be corrected in an ArcGIS editing session by simply moving the location of taking on the map. For further information read paragraph “Start editing session”.
Hint
The new position data is only changed and saved in the geodatabase. The information given in the picture’s header does not change.
In order to end the georeferencing, click on the “Close” button. The list of photos in the currently selected layer opens again.
Settings
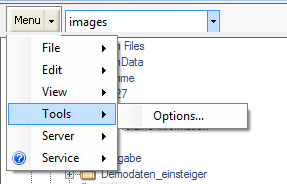
You can find the settings menu under Menu > Tools > Options.
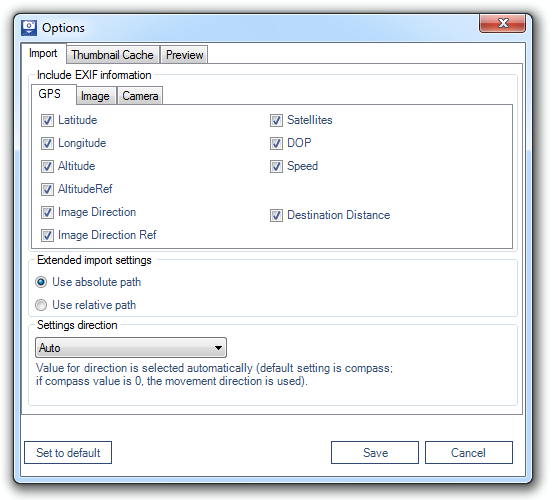
Here you can determine which data fields from the EXIF header of your photos shall be saved in the attribute table of your feature class.
Absolute / relative paths
You can save the path names belonging to the loaded photos as relative path. The advantage of this is that entire projects (Shape file / geodatabase + photos) can be relocated retroactively provided that the directory structure stays the same.
Hint
Please notice that the use of relative paths is not possible if shape file or geodatabase and the photos are on different hard disks.
Select the desired mode in the settings under "Extended import settings”.
Hint
The changes in the settings are not retroactive, i.e. the path statements of already pasted photos are not adapted to the new settings.
Embedding EXIG information
The EXIF information can be added selectively to the attribute table of the feature class.
The parts of EXIF information selected here are taken from the photos' headers and transferred into the attribute table of the feature class.
Hint
If the EXIF settings are changed before importing into an existing feature class, the newly selected categories will be added to the attribute table. Deselected categories remain in the attribute table, the values, however, are no longer transferred from the EXIF header.
Dislocation of photos and map projection
It may happen that the photos are not displayed in their correct position in the map. The reason for this lies frequently in the used coordinate systems and projections. With the wrong settings, a dislocation of about 180 meters is typical. In this chapter, we will explain the causes and describe which settings you have to select in order to make map and photo fit each other exactly.
Projection, datum, ellipsoid, coordinate systems
In order to display the curved earth surface (“terrestrial globe”) in a map, map projections are used. There are numerous projections with different characteristics and for different areas of the earth surface. The real shape of the earth is hereby approached by a so-called ellipsoid (= mathematical description of the 3-dimensional earth) and the exact position of the ellipsoid defined with the so-called datum.
Hint: In some cases, “datum” is also used as a collective term for ellipsoid and datum.
Coordinate systems are used to specify an exact position in a map or on the real earth surface.
For the illustration in a map, projected coordinate systems are used, i.e. a combination of projection (including ellipsoid and datum) and a coordinate system. In Germany, Gauß-Krüger is often used for instance, which applies DHDN (Deutsches Hauptdreiecksnetz; German Main Triangle Net).
Coordinate systems in ArcGIS
All layers used in a data frame are displayed in exactly one coordinate system, namely the coordinate system of the data frame.
If the layers have different coordinate systems, ArcMap will convert them into the coordinate system of the data frame. ArcMap converts the projected coordinate systems automatically.
If the ellipsoid/datum of a layer differs from the ellipsoid/datum of the data frame, however, a so-called datum transformation has to be carried out. ArcMap cannot decide autonomously which datum transformation is to be used. This is where you, the user, have to take action.
Datum transformation for position correction of the gps photos
The GPS photos are taken by the Ricoh G800SE / G700SE / Caplio 500SE in the coordinate system WGS 1984, which uses WGS 1984 as ellipsoid/datum. If you use background map in the data frame with other coordinate systems, e.g. Gauß-Krüger, there will be a spatial displacement of the locations of taking of about 180 meters. This is caused by the Gauß-Krüger coordinate system using DHDN as ellipsoid/datum. So you have to select in ArcMap which datum transformation should be used.
In order to display the GPS photos correctly in the Gauß-Krüger coordinate system as well, proceed as follows:
-
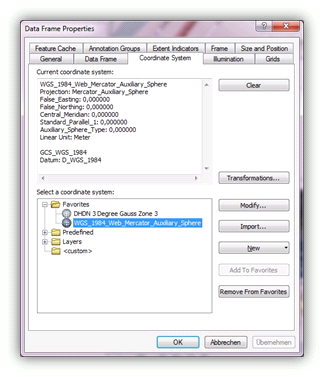
Click with the right mouse button on the data frame in the table of contents and select "attributes". Here you can make the settings for the entire data frame.
-
Click on the index tab "Coordinate system".
-
Select the desired coordinate system.
-
For a display in the Gauß-Krüger system zone 2 follow this path: Predefined/Projected Coordinate Systems/ National Grids/ Germany Zone 2
-
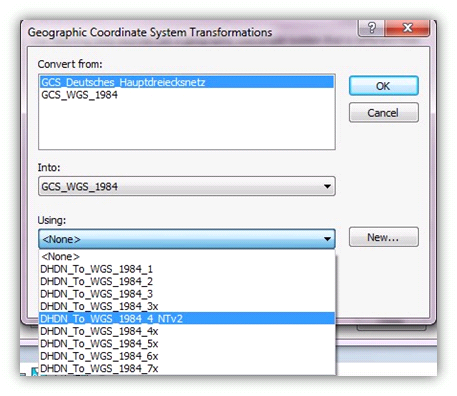
Click on the "Transformations…" button.
-
Select the following parameters:
Transform from: GCS_WGS84
into: GCS_Deutsches_Hauptdreiecksnetz
using: DHDN_to_WGS_1984_2 -
If you should use another system than Gauß-Krüger, modify the details in "into:" and "using".
-
Confirm all windows with "OK".
-
Now the locations of taking of the GPS photos are displayed correctly.