KML Export
Here you can adjust your project for exporting it into Google Earth. If you integrate the created KML-file into Google Earth (by doubleclicking) the map is being shown with the usual satelite data.
The KML-export might has to be activated in the settings (see: Output).
Since Google Earth is using the date of the WGS 84, maps that are based on a different date have to be transformed.
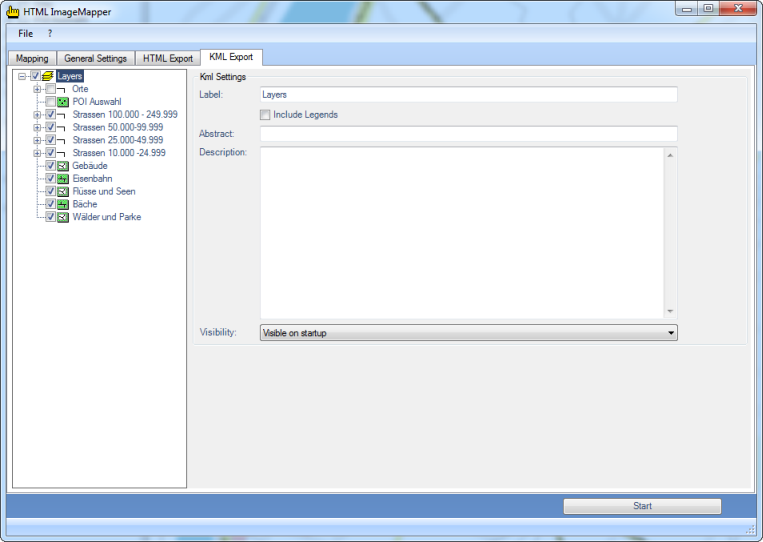
Table of contents
In the directory you can select the layers you want to be shown in Google Earth
Dataframe – KML settings
Here you can describe your KML/KMZ document by entering label, subtitle as well as description. HTML ImageMapper automatically recommends the title of the data frame as the label denomination.
If you want your legends to be shown in Google Earth you have to activate the option export legends. The legends will be inserted as a ScreenOverlay. You also have the option to determine the visibility of your document when starting the application.
Feature Class – KML settings
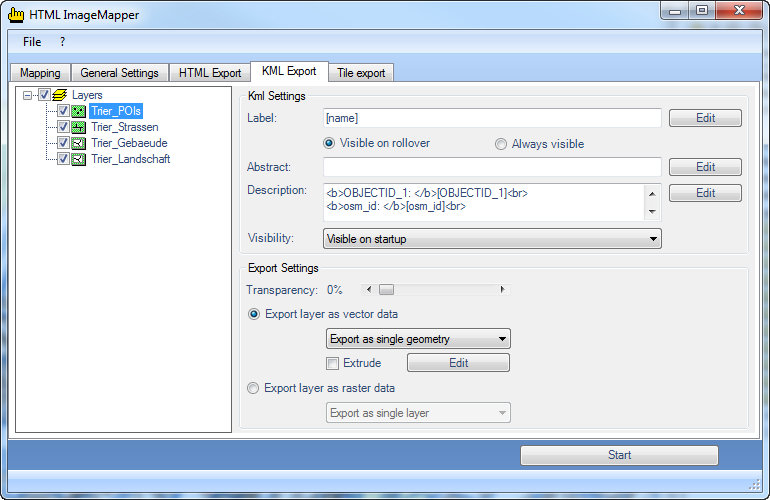
Here as well it is possible to define the label, subtitle, description or the visibility of the document at the start.
Additionally you can define whether the labelling of the map is supposed to be visible at all times, or only when touched by the mouse cursor.
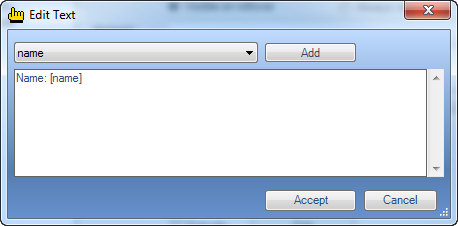
Edit
Label, subtitle and description can be comfortably edited and templates can be created. To do so you select the element which is part of the description and click on “Add”. If needed you can add additional elements and combine them with regular text.
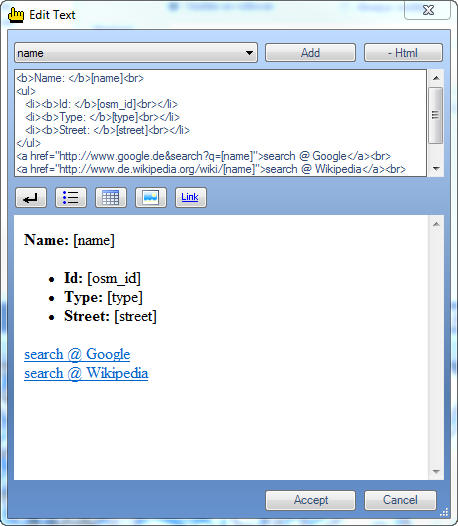
If you edit the description text you have the possibility to additonaly use HTML. By pressing the HTML button, a preview window as well as buttons providing basic HTML functions, are added to the entry window. That way it is possible to add returns, lists, charts pictures and links and combine them with elements of your feature class.
Export Settings
Here you can perform further adjustments for exporting you feature classes.
Transparency
If you want to assign a transparency to the created geometries you can do so. The entered value corresponds with the depicted feature class. A transparency of 10% means that 10% of the feature class will be shown.
Export layer as vector data
Choose this option if you want to grip the contents of the features. You have the option to export single features or all of them together. Depending on the option you have chosen, the extended editing function will be displayed.
Extrusion
This point is only available when exporting vector data and serves the cause to display contents graphically. These are being assigned to the features with the aid of its attribute values.
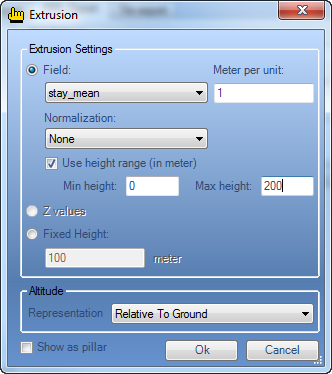
Field
Choose the field of which you want to have the height values calculated, and declare how many meters describe one unit of this field. You also have the option to normalize your field values with a certain value, a field or logarithmically. If the fields contain very high values it is advisable to set a height area. Thereby the values are automatically scaled in that area.
Z Values
If your features already have Z-values you can use these for extrusion.
Fixed Height
If you generally want to heighten your features, choose the setting set height.
Representation
Choose if the presentation of the extrusion is supposed to be relative to the ground or absolute (NN).
Export Layer as Rasterdata
If you want to export your layer as graticule data you can do so. Please be aware that if doing so, a major part of information is going to be lost. You can export the data from the single layers or add it to the background.