Feature Click Action
In the "Feature click action" tab you can define what happens, when the user clicks a symbol of the feature layer in the map application. With the popup option, a little window opens when the user clicks on the symbols shown in the map. Alternatively, you can chose to open a link when a symbol is clicked.

Creating Pop-ups
On the left, all available fields of the data (layer attributes) are listed. These are needed to build the popup window. In the center you have the work area, in which the popup windows can be assembled via drag & drop. Simply click on an attribute text box, image, or video that you want to appear in the pop and drag it into the workspace.
You can enter both static and dynamic information. The dynamic attributes are enclosed by dollar signs ($attribute$). You can also create text boxes that contain both static and dynamic information.
The table wizard  allows you to edit the pop-up window and see a preview of it right away.
You can also copy an already existing configuration of a layer with  . Therefore, the layer has to be in your created map. This function spares you the definition of attributes that are the same for similar layers.
For the configuration of dynamic information as a date field, rather than $attribute$, the following string can be used: $format_date($attribute$,'dd.MM.yyyy'). 'dd.MM.yyyy' specifies the type of date configuration.
Since atlasFX version 3.2 is available you can use the new template-engine Freemarker. This affords the opportunity to write extended expressions for a pop-up.
Any usable functions and statements are listed here: http://freemarker.org/docs/ref_builtins.html
-
by clicking on the content built-ins for numbers you can find specific functions, e.g. abs for the output of absolute numbers, round for rounding of numbers or string for editing the format of numbers
-
the content built-ins for date/time/date-time values gives informations, e.g. about the editing of the format of your date and time values
-
the content built-ins for strings shows further information to verify your text (contains), to capitalize your text or to split specific words
-
at the content seldom used and expert built-ins you can find functions like has_content to verify if a variable has any content.
As an example you can see the following code which will only display the label 'Population:' if the attribute has any content:
<#if population?has_content>Population:</#if>Equally, it is possible to use logical operations:
<#if attr_1?has_content || attr_2?has_content>Die Hauptüberschrift</#if>It is also possible to link direct commands (else, if, elseif...) with built-in commands (string commands trim, replace...). For example, if you just want to show a specific text if a particular variable has a content you use the expression '?has_content'. However, this value also will be shown if it consists of a blank space. You can cut those blank spaces at the beginning or at the end by using the expression '?trim'.
<#if faxnummer?trim?has_content>Fax:</#if><#if faxnummer?trim?has_content>$faxnummer$</#if>Please notice that numbers get formatted in the american spelling (thousands seperators, commas and decomal seperators are displayed as points). By using the following expression it is possible to use a notation with commas instead of points:
${variablenname?string['0.##']?replace('.',',')}More relevante expressions are arithmetical calculations
Support for involved pop-up configuriations by using Freemarker
Do you have any special requirement for your pop-up configuration? We appreciate to support you. Please feel free to contact us.
alta4 AG
tel. +49(0)651.96626-29
email sales@alta4.com
In order to view images (jpg, png, or gif) or videos (flv or f4v) in the popup, drag it out of "Picture / Video" on the right side into the work area. By clicking on the new item with a simple click, the image / video configuration dialog will open.
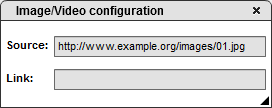
The URL of the image is specified under "source" . This image is then, however, static and appears for each point.
Note: Some browsers, for example Google Chrome, cut off the http:// when copying URLs, which means that the image is not displayed correctly.
It is also possible to create a dynamic image display for each point. For this, a container with the required images has to be available online. Additionally, the caption of images is of great importance for their unambiguous assignment. The above-mentioned dynamic attributes, which are characterized with $, can also be used for the allocation of images:
-
You have an image container with images whose caption exactly matches a layer attribute (preferably a unique ID, which can for example be produced in the data table, when it is read in).
-
Enter the URL in the 'source', but instead of concrete images, write the attribute name by which the images are named (in this example the attribute "id").
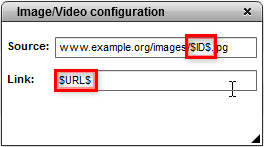
With the field "link", you can assign a hyperlink to the picture in the popup, which will be opened when the user clicks on the image. Again, you have the chance to set up a static or dynamic link. With the same scheme of using the attribute $URL$ in the field "link", you get a dynamic linkage of the data point with the contents of the attribute "URL", i.e. for each point an individual hyperlink.
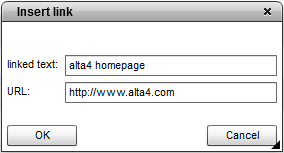
If you would like to add a simple hyperlink without image, use the button "text box" and drag it to your work space. Now you can enter an ordinary text in the field. Mark the passages of text that should be associated with a hyperlink and click on the button  .
.
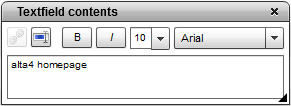
This opens a new user dialog in which you can enter the URL of the link.
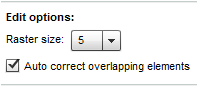
By changing the grid size, you influence the behavior of the text fields within the popup configuration. The number determines from which spatial proximity on fields arrange themselves together automatically.
With the  button you can see what your popup looks like for the map user.
Configuring a direct link
In order to directly open a link when you click on the feature, select "Open link" in the top panel and type in the link address in the field below.
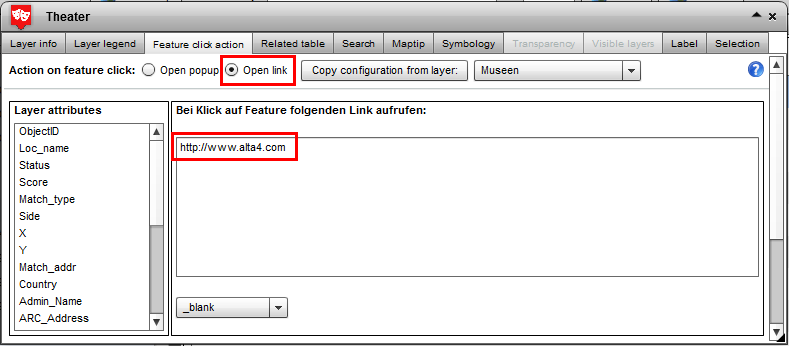
In the drop-down menu below, target window behaviour can be set. "_blank" is set as default. In most cases this is the appropriate choice.
_blank The link will open in a new window
_self the reference is opened in the current window
_parent For nested framesets, the current frameset is blown up
_top For nested framesets, all framesets will are blown up