Layer Info

In the tab "Layer info" you can set the scale range of your layer. The minimum scale defines how long the layer is visible when zooming out. The maximum scale defines, how long the layer will be displayed when zooming in. Outside of these scale ranges, the layer is not visible for the end user. If parameters are entered for the scale range, a scale symbol  is shown in the layer overview of the CMS. The user of the map application is also warned by a symbol in the layer overview, if the selected scale range is outside of the specified range.

For point data, you also have the option to activate "Displace overlapping symbols". Icons of points that are spatially close to each other will displaced, so they can be clicked separately.
No offset  With offset
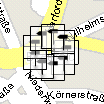
The option "Layer is always visible" determines that the layer can not be deselected by the user, hence the layer is permanently displayed.
The option "Layer is hidden in the TOC", you can remove the layer from the map legend (TOC). The features of the layer are nevertheless displayed on the map.
Caching mode is needed to directly keep data on the server. There are 3 different modes:
-
Manual: The map author globally creates and deletes the cache on an http page (http://myserver:8080/atlas/spring/admin/cache_control/)
-
Automatic: Once users pull data from the server, the data is kept in the server cache. Be careful, this can lead to a server overload!
-
None: No caching is used.
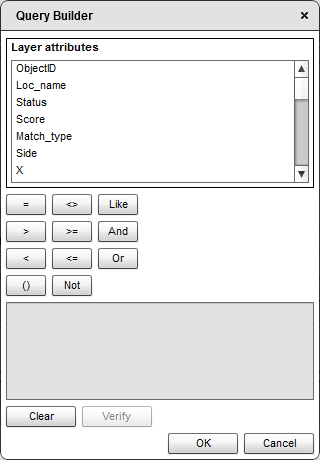
In the field "definition query" you can use a SQL editor to limit the display of data. Here you can put together a data limitation with a few simple mouse clicks. Please check out the chapter "known issues" when using this option.
Use  to save the configuration of that layer. Before you save the configuration, rename the Layer adequate to the definition query.

After saving you will find it in the atlasFX-Browser in the section "Vorkonfiguierte Layer".
Note: Since version 3.1 the Layer-ID information is used for showing or hiding the Layer in the TOC via url parameter. You'll find further information to this topic within the "Interface description atlasFX - JavaScript client" which can be read or downloaded in the download area of alta4.com.